Do you have the question, “How to boot a computer using a pen drive?” in your mind? If yes, then this is a tutorial which will let you to learn about booting a computer using a pen drive. This is a new as well as quite interesting trick to be learned. This will allow you to boot your computer even if you don’t have a DVD/CD-Drive in your desktop, laptop, notebook or mini-laptop. This is a quite easy task to do but you must be very careful while doing this task since this may damage your pen drive too, if not done carefully. But fortunately, the chances of getting you pen drive damaged is just one percent. So, relax and carry on. Now, the requirements or infrastructures that you’ll need to boot your computer using a pen drive are:
- A Pen Drive with a minimum storage capacity of 4 GB.
- Any bootable disk.
Now below are the steps that should be followed in order to create a bootable pen drive:
Step 1: Plug-in your pen drive to your computer.
Step 2: Open Windows PowerShell (OR you can open Command Prompt if Windows PowerShell is not available). If you are using Windows 7 or Windows Vista or above, please open PowerShell or Command Prompt with administrator rights. For opening Windows PowerShell, you can first click on Start menu, then select All Programs. After that click on Accessories and click on Windows PowerShell. Then right click on Windows PowerShell and click on “Run as Administrator”.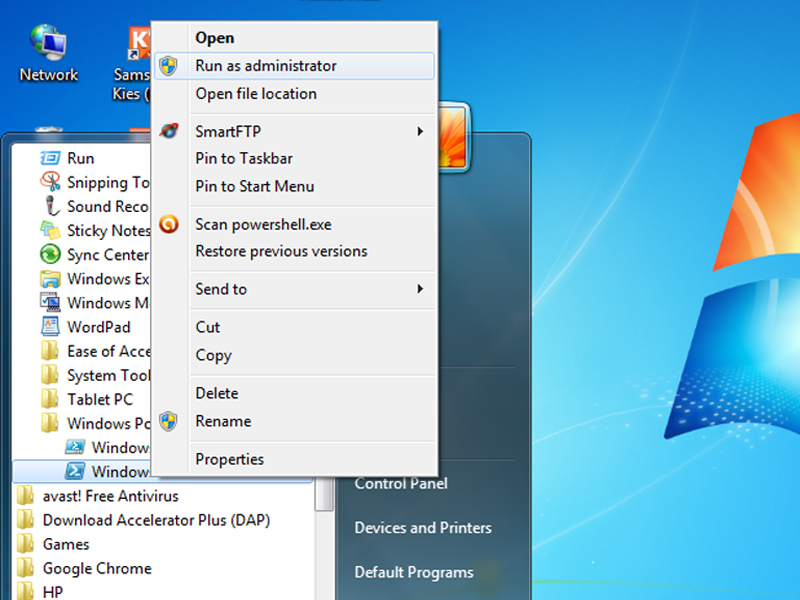
Step 3: After opening Windows PowerShell with administrator rights, type DISKPART
This will start the Microsoft DiskPart utility as shown below:
Now use the following command:
LIST DISK
After using this command, you will be shown a list of available disks on your computer system. Disk 0 is generally the hard disk. In my case, Disk 1 is the USB drive, but this can be different in your case. The preview is given below: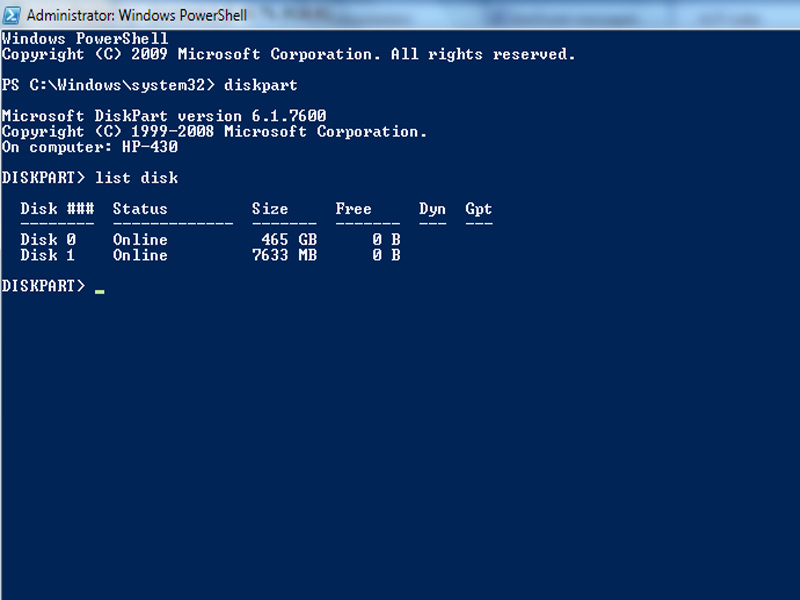
Now issue the command given below:
SELECT DISK 1
Here I used SELECT DISK 1 because 1 is the USB drive number on my system. If you have a different number on your system, then you will have to replace 1 with that number.
Step 4: Now use the following list of commands one by one as shown below:
CLEAN
CREATE PARTITION PRIMARY
SELECT PARTITION 1
ACTIVE
FORMAT FS=NTFS QUICK
ASSIGN
EXIT
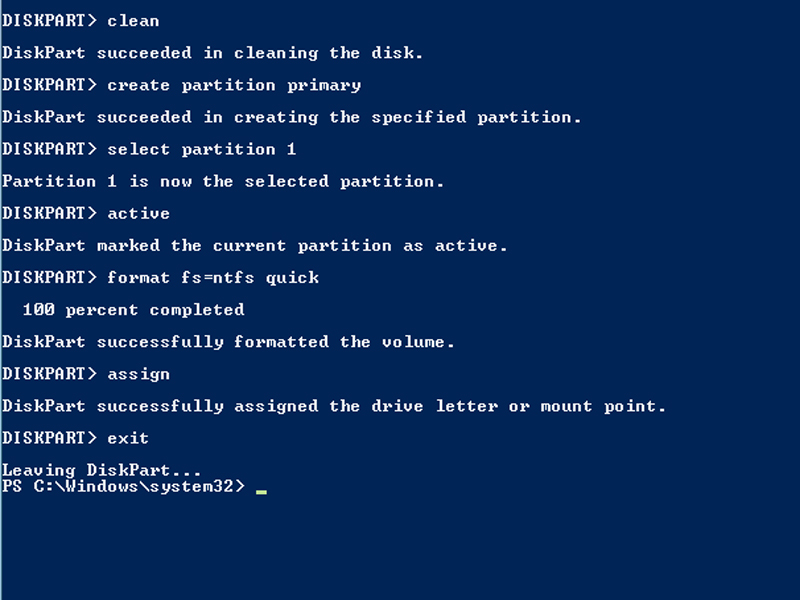
Then close the PowerShell and proceed to next step.
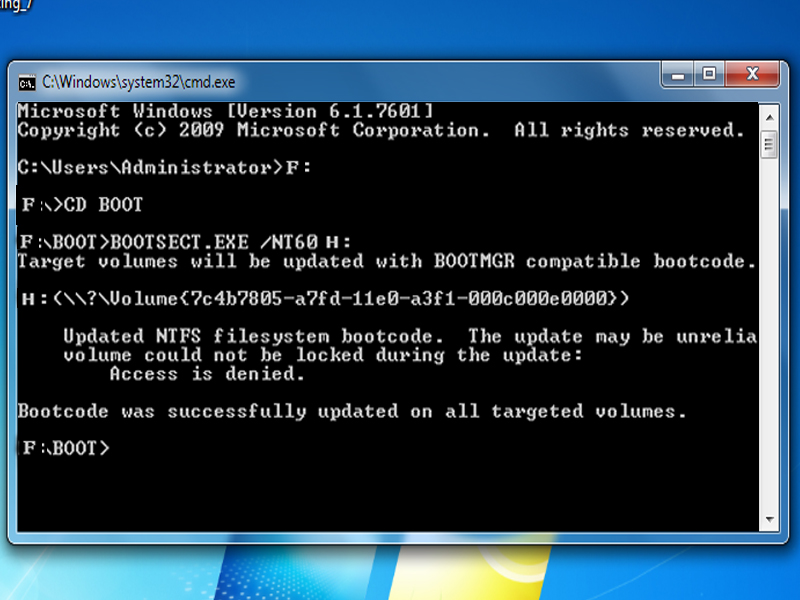
Step 5: Now, this is the step where you have to insert the bootable disk and note down the “drive letter” of your DVD drive. In terms of my computer system, it is “F:”.
Now open Command Prompt. If you are using Windows 7/Vista, please open it with administrator rights. For that, you can click on Start menu. Then go to All Programs and click on Accessories and right click on Command Prompt. Then click on Run as Administrator.

Then type the following list of commands as shown below:
F:
CD BOOT
BOOTSECT.EXE/NT60 H: (Note: H: is your USB drive letter)
EXIT
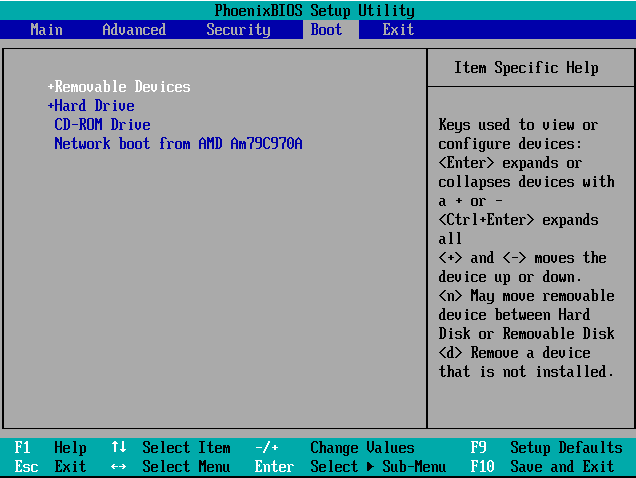
Step 6: Copy all the contents of your Windows 7/Vista installation disk into the USB drive. Then your USB disk is ready to boot and install the operating system for you. Please don’t forget to enable “USB Boot” option and change the boot priority to USB device from hard disk in your BIOS settings.